Geoid is a physical reference surface. Its shape reflects the distribution of mass inside the earth. Geoid undulations are important for converting GPS-derived ellipsoidal height differences to orthometric height differences.
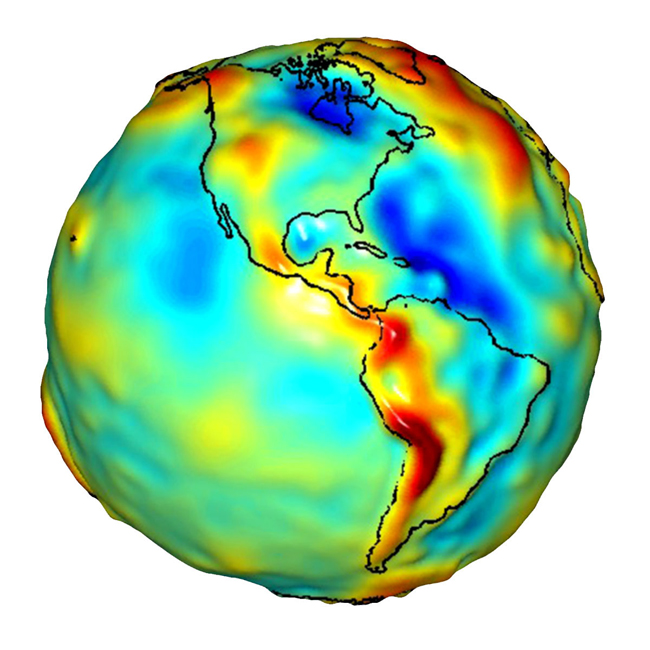
Gravity measurements and tide gauges and other quantities are used to determine the geoid. After the geoid is determined, then other surveys, like Global Positioning System (GPS) or differential leveling, can be used to measure surface elevations.
Learn more at: http://www.ngs.noaa.gov/GEOID/
To appropriately use a geoid file with Topcon you will want to install the same geoid file on your computer and controller prior to adding it to the list.
Global geoid files can be opened and truncated in Topcon Link to fit the file to the job area.
Some geoid files can be installed on the controller during TopSURV installation. They are provided to the user as “.gif” files.
In the Conterminous United States GEOID09 Data files can be downloaded directly from the National Geodetic Survey in a PC binary format. This “.bin” format can be used in it’s native format in Topcon Tools, Topcon Link, and TopSURV.
Files can be found at: http://www.ngs.noaa.gov/PC_PROD/GEOID09/dnpc09u.shtml
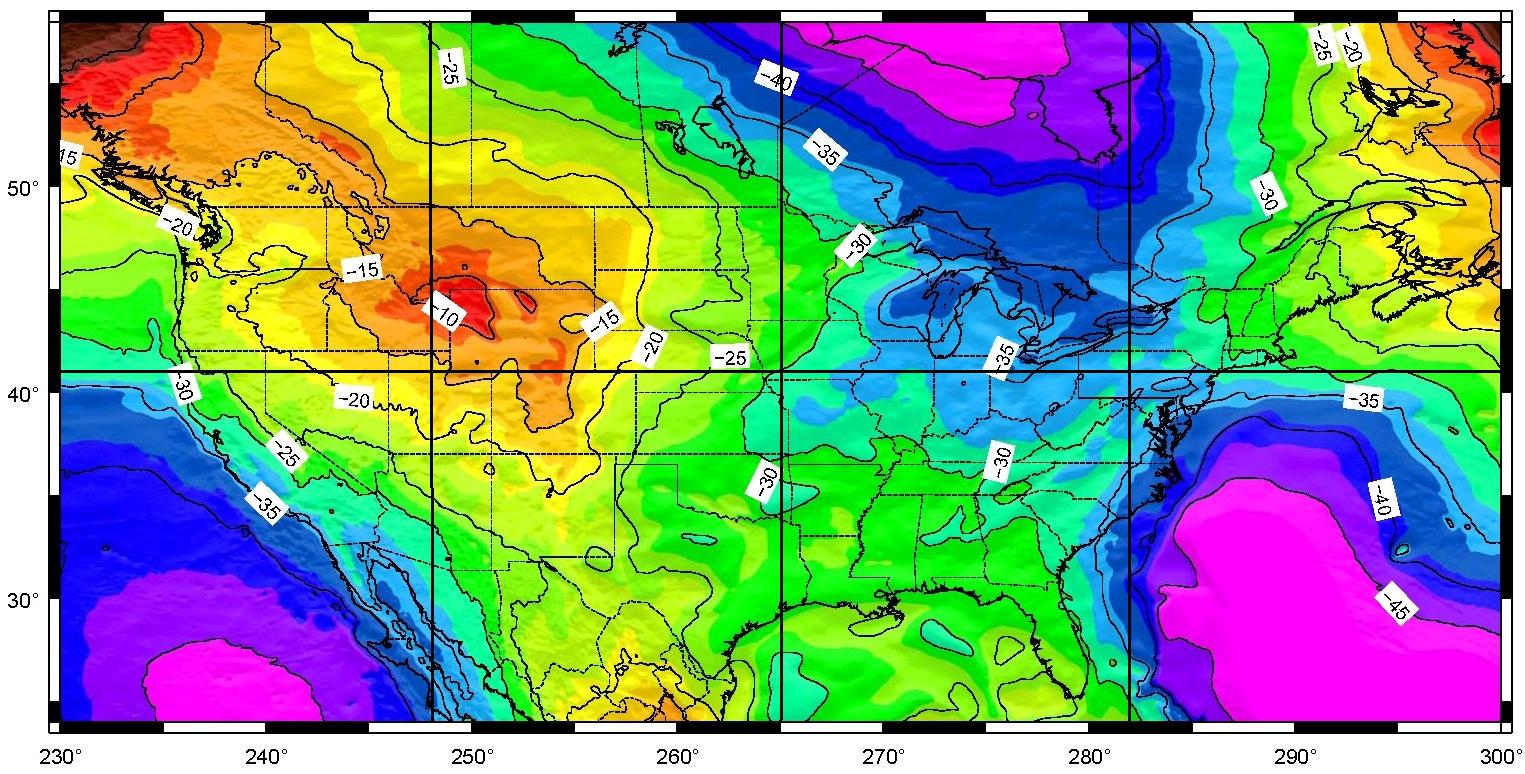
The geoid model for the Conterminous United States is divided into eight grids that can be selected interactively.
The “.bin” files can be stored anywhere on your PC for Topcon Tools and Topcon Link as long as the directory is identified in the Job Configuration.
The same files that are on your PC will need to be copied to the “Geoids” folder in the TopSURV directory on your Field Controller.
In Topcon Tools:
1. From the Job pull-down menu select Job Configuration…
2. Select Coordinate Systems in the left window pane.
3. Click the Geoids List button to import a geoid model to Topcon Tools. Click Add to open a geoid.

4. On the Open dialog box, choose the proper format name and navigate to the location of the geoid file and click Open to add the new geoid model to the Topcon geoids list.
5. Select the new geoid from the Geoid pull-down.
In Topcon Link:
1. From the File pull-down menu select Configuration...
2. Click the Coordinate Systems in the left window pane.
3. Click Add to open a geoid.
4. On the Open dialog box, choose the proper format name and navigate to the location of the geoid file and click Open to add the new geoid model to the Topcon geoids list.
In TopSURV:
1. To add a geoid file to the drop-down list in the Geoids fie ld of the Coordinate System screen, tap the List
 ![]() button next to this field.
button next to this field.
2. On the Geoid List screen press the Add button.
3.Select the proper format: Geoid 99/2003, Australian, Canadian 2000, Canadian 95, Geoid File Format, Mexico 97, Sweden, Denmark, Dutch2004 Files, or Norwegian Files.
4. On the Add Geoid screen, select a Geoid file from  the controller directory to view the boundaries of the geoid application.
5. Press OK to return to the Geoid List screen with the geoid file added. This list corresponds to the Geoids drop-down list in the Coord System screen
(Geoid images courtesy of National Geodetic Survey)