Tuesday, October 27, 2009

Components of Mobile LiDAR

The components that make Mobile LiDAR Mapping a reality – Ken Shipley PLS

New technology and recent advancements in the Mobile LiDAR Mapping arena now provide survey, mapping and GIS professionals a rapid method of data collection from a moving vehicle.

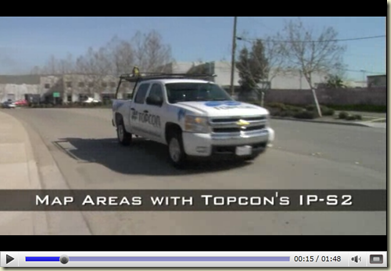
To understand this new technology I will review six components that contribute to the process of three dimensional data collection. A Topcon IP-S2 system is illustrated below for reference.

Overall Components

Global Navigation Satellite System (GNSS) Positioning

Standard generic term for global satellite navigation systems that provides autonomous geo-spatial positioning with global coverage. GNSS allows smallGNSS Component electronic receivers to determine location (longitude, latitude, and altitude) within a few meters using time  signals transmitted along a line-of-sight by radio from satellites. Receivers on the ground with a fixed position can also be used to calculate the precise time and position to centimeter level accuracy.

Inertial Measurement Unit (IMU)

The IMU measures and reports on the vehicles velocity and orientation and is instrumental in supplying IMU Component correction values for acceleration and rotation of the vehicle. The IMU uses a combination of accelerometers and gyroscopes and are typically used to maneuver aircraft, including UAVs. This sophisticated electronic component has been primarily developed for missile and unmanned aerial system guidance for the military.

Light Detection and Ranging (LiDAR) Sensors

The LiDAR sensors measure laser light returns to LiDAR Component determine line of sight distances at a rapid rate. The result is a dense cloud of points with XYZ coordinate values. By using the constant speed of light, the time difference between the emission and the reflection can be converted into a slant range distance (line-of-sight distance). With an accurate position and orientation of the sensor provided by GNSS and IMU data, the XYZ coordinate of the reflective surface can be calculated.

Vehicle Data Bus (CAN-bus) and Wheel Encoders

The CAN-bus is  a high-integrity serial data communications bus for real-time control applications and can operate at data rates of up to 1 Mega bits per CANbus component second. The CAN-bus has excellent error detection and confinement capabilities and was originally developed for use in cars. They are now being used in many other industrial automation and control applications.

Wheel Encoders are the preferred method for vehicle tracking during GNSS outages and  allow one to measure the precise speed or distance a wheel travels. With Wheel encoder wheel encoders it is possible to determine the direction of movement and provide information for odometry (use of data from the movement of actuators to estimate change in position over time). Vehicle direction can be determined by implementing two line detectors with two tracks and a set phase.

360 Degree Camera

Cameras are used to collected image data for visual reference and colorization of the point clouds.  Various camera configurations are can be used for 36o degree spherical imagery.  ladybug3

The following specifications are for the Ladybug3 manufactured by Point Grey: Embedded JPEG compression engine800Mbit/s IEEE-1394b (FireWire) interface, 12 MP images at 15 FPS, Six (6) progressive scan color CCDs.

Receiver/Recorder

The Receiver/Recorder provides processing, Recieverlogging and time-stamping of sensor data to provide real-time,  fused feedback. The logged data file may also be post-processed and filtered offline to provide improved position information and geo-registration of sensor data.

The Results

Also see - GIS Data Collection with Topcon IP-S2

Tuesday, September 22, 2009

Processing Exterior Scans with EdgeWise

This is a continuation of the previous post Processing Interiors with EdgeWise by ClearEdge 3D.

In this example I used two scans captured from different locations. The positions were previously determined with a conventional traverse that is used for control around the Holman’s Tempe retail store. The scanner used to capture the data was a Topcon GLS-1000. The scanner was set over control points and the Occupy/backsight feature was used to orient the scans to the control coordinates without the use of multiple targets.

As in the previous interior example I used EdgeWise to extract the edges and model the flat surfaces of the building scan.

image

The Edgewise software leads the user through approximately seven easy steps:

  1. Import the Scan (PTX)
  2. Locate the scanner (assign X,Y,Z values if needed)
  3. Index the point cloud.
  4. Extract the ground surface (if needed)
  5. Classify the surfaces (two stages: Initial and Final)
  6. Extract the edges
  7. Export to DXF file

image

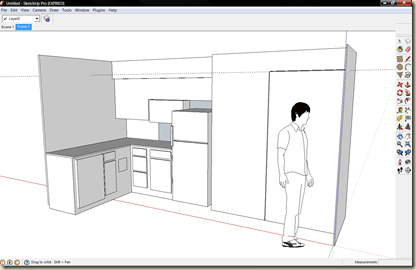
The model is exported to a DXF file and then imported into Google SketchUp or a CAD package for modeling.

image

image

image

Monday, September 14, 2009

Processing Interior scans with EdgeWise

Extracting edges from EdgeWise, a software developed by ClearEdge 3D has proved to be a very user friendly application for extracting 3D polygons and edges from a point cloud. A process I was able to learn in little less than an hour during a web conference with Kevin Williams, of ClearEdge 3D.

In the small example below I started by importing a PTX file that was exported from Topcon’s ScanMaster software. The scan originated from a Topcon GLS-1000 laser scanner.

The Edgewise software leads the user through approximately seven easy steps:

  1. Import the Scan (PTX)
  2. Locate the scanner (assign X,Y,Z values if needed)
  3. Index the point cloud.
  4. Extract the ground surface (if needed)
  5. Classify the surfaces (two stages: Initial and Final)
  6. Extract the edges
  7. Export to DXF file

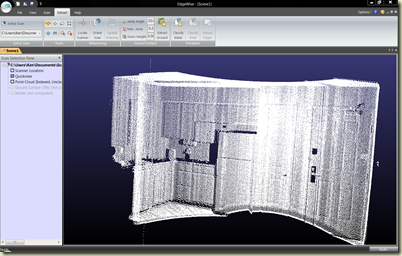
imageScan data as imported from PTX scan file. The scanner location is confirmed and the points are indexed.

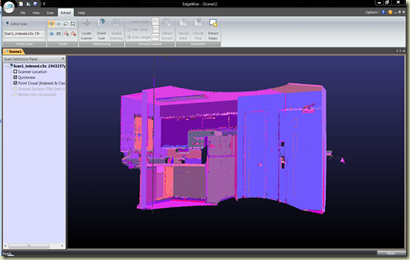
imageThe Initial Classification.

imageThe Final Classification.

image Extracted edges and surfaces are calculated.

image The model is exported to CAD or SketchUp in a DXF format.

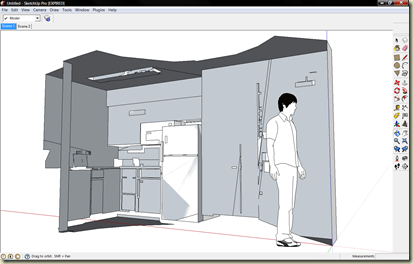
imageFinal modeling and texturing can be completed in the modeling software of choice. (Google SketchUp pictured above)

Scan data captured with Topcon’s GLS-1000 , using precise scan technology. The GLS-1000 is an ideal product for capturing clean point cloud data for EdgeWise.

Tuesday, September 8, 2009

GIS Data Collection with Topcon IP-S2

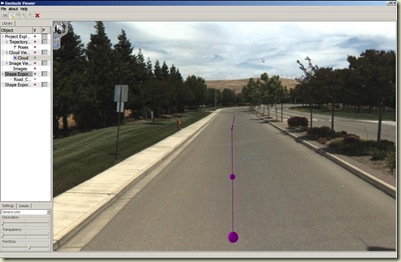
IP-S2 Topcon has a unique new solution for GIS data collection with their new 3D Mobile Mapping solution, the IP-S2. This new system incorporates 360 degree panoramic images with point cloud data. This application allows the user to collect data from within the spherical view of the image while snapping to the precise point cloud data captured from the scanner.
GeoTools 2 
Data collected in the form of shapefiles can be imported into your ArcGIS database. Shapefiles can also be imported into the Topcon software to view within the image and scan data to validate existing locations.  
IP-S2 features:
  • High definition mobile 3D mapping
  • Dual frequency GNSS tracking
  • High Accuracy 6-Axis IMU Integration
  • Odometry inputs from on-board vehicle CAN bus or wheel encoders
  • Supports multiple laser scanner models for operator and application flexibility
GeoTools 6
IP-S2 Applications
  • Roadway Management
    • Paved Surface Inspection
    • Roadside Feature Inventory
    • Photo Logs
  • Linear Infrastructure
    • Pipeline Inspection
    • Railway Survey
    • Utility Corridor Mapping
  • Disaster Planning and Response
  • Homeland Security
  • 3D Street-view city mapping
GeoTools 7
IP-S2 System features
A web-based processing service with desktop PC interface is included as part of the IP-S2 system. Vehicle position and sensor output are integrated seamlessly into one continuous three-dimensional data stream that can be exported as industry-standard formats. GNSS data can be post processed for higher accuracy. The desktop software also includes a viewer enabling the user to review point clouds generated from LiDAR scanners and make linear measurements.
The IP-S2 provides fast, high accuracy data and dynamic imaging for any linear mapping project. The vehicle-mounted system can map data at normal travel speeds for roadway surface condition assessments and roadside feature inventories. Safety is increased by removing pedestrians from the travelled lanes. Other applications include pipelines, railways, utility corridors, and waterways. Homeland security and disaster management are critically important to our health, safety and welfare. The IP-S2 is perfect for 3D street-view city mapping and provides essential information for these applications
image
Integrated Positioning System
Topcon’s IP-S2 Mobile Mapping System overcomes the challenges of mapping linear features to a high level of accuracy. Accurate vehicle positions are obtained using three redundant technologies: a dual frequency GNSS receiver establishes a geospatial position; an Inertial Measurement Unit (IMU) tracks vehicle posse; and connection to the vehicle CAN bus or external wheel encoders obtains odometry information. These three technologies work together to sustain a highly accurate 3D position for the vehicle even in locations where satellite signals can be blocked by obstructions such as buildings, bridges, or tree lines.
More information

Wednesday, August 5, 2009

Using Scan Data to Model a Cell Tower in SketchUp

Below are a few examples of a cell tower project completed with the Topcon GLS-1000, Topcon ScanMaster, and Google SketchUp.


Four scans were captured. The scanner was positioned on one of two control points using occupation/backsight procedures.
The control point coordinates were obtained with GPS so that the final model could be georeferenced once completed.
High resolution scans of the tower were capture for detail while the surrounding building was scanned at a lower resolution for general dimensions.

The scans were registered and post processed in ScanMaster. Different views were created of the tower to break it down into segments for measurement.

Measurements from the scan data was used with Google Sketchup to build the 3D model.

GPS coordinates for the control points were used to reference the model for import to Google Earth.

Thursday, July 23, 2009

SATAI Conference 2009

The Holman's Team recently attended the Southwestern Association of Technical Accident Investigators, Inc. (SATAI) conference in Glendale Arizona. Holman’s was invited to locate a rollover scene that was coordinated by the association for accident reconstruction purposes.

We were invited to demonstrated the use of three different technologies – Network GPS, Laser Scanning and a Robotic Total Station with Imaging Capabilities.

The first method of location was completed using a Topcon GRS-1. This handheld GPS receiver has a built in cell phone that can dial into a base reference network and receive corrections. By adding an external antenna (PGA-1) we were able to get centimeter accuracy for location. The GRS-1 also has a built-in camera for capturing images that are automatically attached as an attribute for the point. Topcon calls this a "Photo Note". The GRS-1 was used to locate the position of the vehicle, glass fragments and tire skids.

The second method of locating the accident scene was with the Topcon Image Station (IS). The IS allows the user to operate this robotic instrument in a number of different methods allowing one to collect data in accordance with the task at hand. The IS can be operated as a conventional total station, robotic total station (from the rod), or remotely with a PC.
The key to running the IS from a PC is the fact that the IS has WiFi capability and two cameras which allow the user to direct the instrument to the point of interest through the broadcast image. The cameras also allow the user to collect two images for each shot, one wide angle image and one close up (30X zoom).

The cameras can also capture a 360 degree panoramic of the scene. Topcon calls this a “Photo Field Book”. The panoramic images are viewed with included Topcon software, Image Master for IS.


Image Master also allows the user to create 3d polylines, surface models, and solids which can be draped with the captured images to create a 3D model.
On top of all of this the IS is also capable of collecting dense point clouds for detailed object analysis.


All of the Topcon data, GPS and Terrestrial, located with the GRS-1 and the IS was processed in Topcon’s post processing and data management Software, Topcon Tools. Topcon Tools brings all of the data together for review in a number of different formats for review. In CAD view the user can view all of the data from a bird’s eye point of view. Arial imagery can also be incorporated to add background. All of the collected images can also be reviewed in accordance with the collected point of view. Tools also allows images collected by the Image Station to be used as a background for the points and polylines collected in the field. Tools also allows one to view the collected data in Google Earth with the images collect!

The third technology demonstrated was a Laser Scanner with Intelisum technology. This innovative technology can rapidly capture millions of points during each occupation station creating “point clouds” while simultaneously capturing high resolution images.

This unique new technology incorporates or “fuses” the high resolution imagery with the point clouds to create what Intelisum calls “Intelligent Pixels”. This allows the user to very quickly (really automatically) create a 3D model of the scene in Intelisum’s modeling softaware LD3 Modeler. Point information, measurements and analysis can then be made very easily in a virtual setting on the PC. Portions of this model can be exported to a CAD file or OBJ for use in other applications if needed.


Thanks to all of the guys at SATAI for allowing us this opportunity to demonstarte this new and unique technology!

Saturday, February 7, 2009

Topcon GLS-1000 Training

Ken Shipley, PLS
From GLS-1000 Training LAS


I just returned from a week long training session in Las Vegas on the new Topcon GLS-1000 (Geodetic Laser Scanner). The training was led by Topcon staff members and was very informative, allowing me to get much more familiar with this new product and its features. I was actually quite amazed with the whole design and simplicity of use. I’m posting some of the specifications and highlights together with some images from the training below:

Operator friendly, compact all in one design
Offers quick and hassle free setups, which reduce the amount of time between instrument setups and improve productivity. The GLS-1000’s design incorporates the use of on-board lithium ion batteries, so there is no need to carry around a bulky 12 volt battery. The aerodynamic design helps reduce the affect of wind.

Precise Scan Technology
The GLS-1000 integrates pulse-based time of flight and phase-based technologies to achieve industry leading accuracy and “clean” scan data. The GLS-1000 inherently has less point cloud noise, the most consistent accuracy, the ability to detail slight texture variations and great results at ranges over 100m.

On-board lithium ion batteries
The incorporation of on-board batteries reduces the amount of needed equipment in the field. The GLS-1000 uses four batteries two per side and these batteries are hot swappable.

Class 1 invisible, eye safe, laser
The GLS-1000’s laser is a class 1, invisible, and eye safe laser, which allows the unit to operate at any time or place with no effect to people or the environment.

From GLS-1000 Training LAS


Built in 2 mega pixel digital camera
The 2 mega pixel digital camera allows for sharp and more detailed images. When connected to a PC, the digital camera offers live video feed of the job site, which aids in the scan setup and data acquisition. With the camera being built in this also reduces the amount of equipment needed in the field.

Wireless LAN and USB connectivity
The GLS-1000 offers wireless LAN (802.11b) and USB 2.0 PC connection.

Dual axis compensators
The use of dual axis compensators allows for more accurate instrument setups and scans. Occupy a known coordinate and backsight so traversing within one coordinate system is possible. Compensators can be turned off for tiltable mounts.

3000 points/second scan rate
The GLS-1000’s class 1 laser has a data capture rate of 3000 points/second for fast and reliable scans of hundreds of thousands of points in just minutes.

150m/330m range
The GLS-1000 scan range is 150m to a typical surface (18% reflectivity). Extended range to 330m to more reflective surfaces.

4mm from 1-150m single point accuracy
The class 1 laser of the GLS-1000 has a single point accuracy of 4mm throughout the 150m range. Unique to Topcon’s GLS-1000 is the mechanical ability to select from multiple lens arrays to control the laser beam. This provides consistent 4mm accuracy throughout the range from 1m to 150m. This ability is an advantage over single lens competitive scanners where the accuracy changes throughout the range of the laser.

6” horizontal and vertical angle accuracy
With the use of dual axis compensators, this allows the GLS-1000 to maintain an angular accuracy of 6”. This superior accuracy is a result of decades of Topcon optical angle encoders’ experience.

On-board data collection, LCD display and keyboard
The GLS-1000 has an on-board data collector with a LCD display and 21 keys keyboard. The GLS-1000 has the ability to function as a stand-alone laser scanner with no need to connect to a computer. This ability gives the scanner the freedom of not needing a PC to operate, which further reduces the amount of required field equipment.

SD card data storage
SD card data storage allows for easy data transfer from on-board data collector to processing software.

Horizontal and vertical jogs
The use of the GLS-1000’s horizontal and vertical jogs greatly increases the orientation process of setting up scans. The jogs also aid the use of the on-board data collector.

Low power consumption
The use of a class 1 invisible laser offers the benefit of low power consumption. With lower power consumption, the GLS-1000 can operate at longer times with fewer battery changes. Remarkably, distance, speed, and accuracy were not compromised while maintaining this lower power consumption.
From GLS-1000 Training LAS

4 hour battery life from on-board batteries
With the low power consumption of the class 1 laser, the GLS-1000 can operate for 4 hours doing a continuous scan on one set of batteries at a temperature of 20˚C.

Optical plummet
The GLS-1000 includes an optical plummet to help with faster control point setups.

Electronic tilt display
To aid in leveling the GLS-1000 the, instrument has the ability to electronically display the tilt reading.

Thursday, January 22, 2009

Keeping a Competitive Edge in Today's Survey Market with GIS, Imaging, and 3D modeling

Ken Shipley, PLS

Today's survey instruments and the technology that supports them have changed so dramatically in the last 5 to 10 years that they are almost unrecognizable, or are they? With new technology come new opportunities for the Professional Surveyor to traverse outside of their two dimensional boundaries. Keeping up to date on these new trends and modern data collection techniques can allow the Surveyor to not only broaden his or her current client base, but also remain profitable during these challenging economic times.

Feeding the GIS Monster

As the GIS based world increases users it is also requiring a huge demand for data, high quality, and reliable data. The Professional Surveyor is the expert in data collection and the perfect candidate to help feed the GIS beast. Data collection deliverables for the GIS market can be a bit different from the conventional methods that many Surveyors are akin to, however, not that hard to understand. Gaining the right knowledge for GIS data collection can be easy to do with the right approach, technique, and a proper understanding of the required deliverables. Modern data collection applications can help make this a reality, without having intricate knowledge of the inner most GIS secrets. Help feed the beast and create a new client base with GIS data collection.

Imaging Techniques for Survey

Typical data collection techniques and deliverables have remained consistently boring with CAD driven software and the black and white printed results of survey. Many of the current survey technologies now incorporate built-in color cameras that can bring the traditional deliverable to life through imaging. Built-in cameras can now be found integrated with Total Stations, Data Collectors, and Laser Scanners. By keeping current with the latest in camera technologies Surveyors can learn how these new hardware and software features can produce a more desirable deliverable through imaging. Surveyors can attach images to point data as attributes for GIS and CAD applications, create three-dimensional panoramic images of a job site, and capture an image directly from the scope of a Total Station. Allowing the client to visualize what the Surveyor witnesses on the ground can be a huge advantage for the client and increase the likelihood that they will return for more.

3D modeling and Laser scanning

The 3D modeling and Laser scanning business has proven to be anything but a downtrend in return business for the Professional Surveyor.
Having these capabilities will not only allow a Survey business to prosper during the current trends, but also help meet the ever increasing requirements for this type of service. The current movement 3D models as deliverables has increased dramatically over the years and will only get more popular as we enter into the age of infrastructure restoration and improvement. Preparing a 3D model can be as easy as using current topographic techniques with new modeling software or making an investment in a full 3D laser scanner for dense point cloud data collection. In combination with today's internet tools such as Google Earth and VRML (virtual reality modeling language) Surveyors can produce spectacular 3D deliverables for their clients.